.webp) reviewgameapp.com
reviewgameapp.comMastering City Rescue Forklift Simulator: The Ultimate Strategy Guide and Field Manual
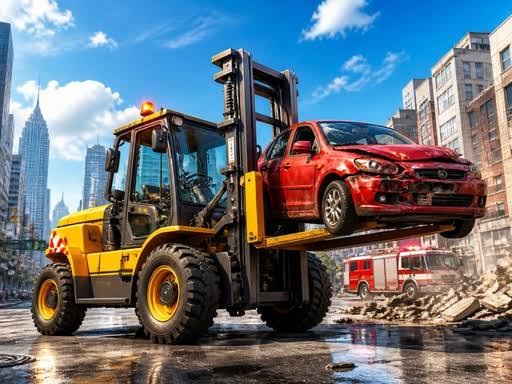
Urban emergency operations demand speed, mechanical precision, and calm nerves under strict deadlines. Unlike standard industrial titles that confine players to smooth concrete floors inside quiet logistics centers, City Rescue Forklift Simulator thrusts operators into chaotic public thoroughfares, multi-vehicle pileups, disaster zones, and high-pressure breakdown scenarios. Maneuvering a high-tonnage heavy lifter across cracked asphalt, around unpredictable civilian traffic, and through confined city alleys requires a completely different tactical mindset than stacking pallets in a climate-controlled warehouse. Every emergency call introduces unique structural challenges where a single mistake can damage the salvaged vehicle, tip your forklift, or fail the mission timer.
To consistently earn top ratings and safely clear municipal roadways, you must master rear-wheel mechanics, center-of-gravity management, rapid dispatch routing, and surgical hydraulic control. This comprehensive operational manual walks you through every stage of your career—from pre-ignition calibration and basic chassis maneuvering to advanced debris recovery, high-speed transit, and long-term fleet upgrades. Follow these structured field protocols to elevate your driving, rescue immobilized assets, and dominate the metropolitan leaderboards.
Phase 1: Initial Orientation and Master Control Configuration
Before responding to your first emergency call, you must calibrate your input profile and get comfortable with how heavy machinery responds to digital or analog commands. Forklifts in an urban environment do not handle like sports cars; their responsiveness is dictated by hydraulic response curves, dead zones, and immense front-axle friction. Spending time in the options menu to map camera switching and hydraulic adjustments ensures you do not panic when wedged between a guardrail and an overturned SUV.
Optimizing Control Schemes for Urban Response
Proper control layout separates rookie operators from seasoned rescue professionals. In the PC release or mobile emulator setup, separating driving controls from hydraulic lift and tilt axes prevents catastrophic accidental inputs. Your fingers must intuitively distinguish between lowering the carriage and applying forward throttle, particularly when performing emergency stops using the handbrake.
Essential Control Layout Priorities
• Dedicated Brake and Throttle: Keep throttle and mechanical braking distinct to prevent sliding forward into damaged assets.
• Fast Camera Toggle: Map your third-person view and top-down mast camera close to your resting hand position for quick angle checks.
• Hydraulic Micro-Adjust: Lower sensitivity specifically for fork tilt to avoid sudden jolts while carrying loads.
• Emergency Handbrake Access: Bind the emergency handbrake to a spacebar or large shoulder paddle to halt skids instantaneously on wet asphalt.
Fine-tuning these baseline settings prevents over-steering during emergency sprints and minimizes input lag during delicate salvage work. Take fifteen minutes in the starter depot lot to practice feathering the throttle, observing how the engine brake operates when you release acceleration, and testing braking distances at top speed. Once muscle memory takes hold, you are ready to venture past the depot gates.
Phase 2: Fundamental Physics and Rear-Wheel Steering Acclimation

The defining physical characteristic of any industrial forklift is its rear-wheel steering architecture. While this design allows for a nearly zero-degree turning radius in confined alleys, it completely inverts standard steering habits. When you turn the wheel to the left, the rear counterweight kicks out hard to the right. On busy city avenues lined with lamp posts, traffic signals, and stranded pedestrians, this rear swing is the primary cause of environmental collision penalties.
Managing the Rear Swing and Turning Radius
Operating a rescue forklift in tight street corridors requires constant vigilance regarding tail swing. Drivers accustomed to front-steer automobiles often turn prematurely when rounding street corners, smashing their steel counterweight directly into walls or fire hydrants. You must drive deep into an intersection before executing a sharp cut, giving your wide rear chassis clearance to rotate safely through open space.
Steering Tactics to Prevent Urban Collisions
• Deep Intersection Pivoting: Pull forward until your front axle aligns with the corner curb before initiating a ninety-degree turn.
• Counter-Steer Planning: Always visually scan the area on the outside of your turning arc to clear pedestrians and obstacles.
• Neutral Throttle Pivoting: Slow down to a crawl when rotating in tight salvage alleys rather than gunning the engine through a turn.
• Reverse Maneuvering Mastery: Remember that driving in reverse makes steering feel similar to standard vehicles, offering greater directional precision when backing out.
Mastering this pivot dynamic transforms tight spaces from hazards into operational advantages. When faced with a multi-car blockage, an experienced forklift driver can weave through gaps where traditional tow trucks cannot fit. Consistent respect for rear chassis inertia protects your collision rating and keeps your vehicle intact throughout the shift.
Phase 3: Dispatch Briefing and Route Reconnaissance
The moment an incident siren triggers, the mission timer starts ticking down. Inexperienced players rush blindly into traffic following only the basic directional arrow on their heads-up display (HUD), often running straight into traffic jams, dead ends, or impassable construction zones. Successful operators treat the first three to five seconds of every dispatch call as a strategic planning phase, pulling up the district mini-map to chart the most efficient route to the casualty site.
Analyzing the Mini-Map and Congestion Patterns
Every district in City Rescue Forklift Simulator features dynamic traffic flow and urban roadblocks. High-density commercial districts often have gridlocked intersections, while residential streets feature parked cars that narrow the navigable lane. Taking an extra five seconds to select a broad arterial road or an open transit corridor will consistently save you thirty seconds of slow crawling behind stalled computer-controlled traffic.
Pre-Transit Route Optimization Criteria
• Boulevard Selection: Prioritize wide multi-lane avenues that provide plenty of room to pass slow-moving vehicles safely.
• Alleyway Verification: Avoid narrow alley shortcuts unless you are operating a compact counterbalance unit without a load.
• Elevation Analysis: Steer clear of steep uphill climbs when traveling with heavy payloads, as high grades slash acceleration.
• Hazard Avoidance: Check the map for construction cones, roadwork, and fallen utility wires that require complex detours.
Once your route is chosen, commit to it with calculated speed. Keep your eyes shifting between the immediate road surface and the mini-map to anticipate road bends early. By arriving at the incident scene with time to spare on your mission clock, you reduce the psychological pressure during the delicate lifting process that follows.
Phase 4: Arriving On-Scene and Hazard Perimeter Assessment
Arriving at the accident scene requires an abrupt transition from high-speed navigation to clinical precision. Carelessly flying into an active incident zone often leads to collisions with the very vehicle you were dispatched to save. You must bring the forklift to a complete stop outside the hazard perimeter, engage the parking brake, and quickly analyze the target vehicle's position, damage status, and orientation.
Evaluating Environmental Obstacles and Civilian Hazards
Urban crash sites are rarely clean or symmetrical. You will encounter vehicles resting at awkward angles against guardrails, flipped onto their roofs, or wedged between masonry planters. You must identify the clearest approach line that allows your forks to enter under the target chassis without your mast striking overhead wires or street signs. Take note of spilled cargo, oil slicks, and debris scatter, as running over debris can destabilize your traction.
On-Scene Arrival Checklist
• Staging Position: Stop three to four forklift lengths away to establish an unobstructed view of the target load.
• Surface Evaluation: Check whether the target sits on flat asphalt, uneven curbs, or slick drainage grates.
• Structural Integrity: Determine if the target vehicle is structurally solid or fragmented, which dictates fork width settings.
• Traffic Clearance: Ensure your rear counterweight will not swing out into oncoming active lanes while positioning your forks.
Once your assessment is complete, align your machine perpendicular to the target's balance points before driving forward. Rushing this preparation phase inevitably results in misaligned fork prongs, crumpled body panels, and harsh mission score penalties. Methodical approach preparation is the foundation of every five-star rescue run.
Phase 5: Fork Alignment and Initial Load Engagement
Engaging a damaged vehicle with steel forks requires millimeter-level alignment. Unlike uniform wooden pallets with prefabricated entry slots, car chassis feature irregular balance zones, delicate fuel tanks, and low-hanging exhaust systems. If your forks are adjusted too narrow, the vehicle will wobble and fall sideways; if they are adjusted too wide, the tines will scrape the tires or suspension arms, preventing a flush lift.
Approaching Damaged Vehicles and Structural Debris
To safely engage the vehicle, lower the carriage until the forks ride approximately one to two inches above the pavement surface. Ensure the mast is perfectly vertical (zero degrees tilt). Slowly creep forward using low throttle, guiding the tines beneath the center section of the chassis between the front and rear wheels. Switch to the bumper or fork camera view to verify that both tines pass underneath the vehicle's structural frame rather than skewering through wheels or bodywork.
Key Insertion Best Practices
• Perpendicular Approach: Never insert forks at an angle; align the forklift completely square to the side of the car.
• Full-Depth Insertion: Drive forward until the backrest of the fork carriage rests flush against the target vehicle's side.
• Centering Wheelbase: Position the forks equidistant from the vehicle’s front and rear axles to match its center of mass.
• Tine Width Matching: Use hydraulic tine-spread controls to maximize the support base under the floor pan.
When the carriage backrest makes gentle contact with the target, apply your foot brake immediately. Do not attempt to raise the load while the forklift is still moving forward, as this creates sheer stress that can bend your mast or flip the rescued automobile over the forks. Full mechanical rest is mandatory before touching the hydraulic lift levers.
Phase 6: Hydraulic Mast Lifting and Counterbalance Tilt
Lifting heavy cargo shifts the entire center of gravity of your vehicle forward, completely altering its handling dynamics. Every forklift relies on an internal stability triangle formed by the two front drive wheels and the center pivot of the rear steer axle. If the combined center of mass of the machine and the load exits this triangle, a catastrophic rollover occurs. Managing mast hydraulics correctly is how you keep your machine grounded.
Mastering the Stability Triangle and Mast Inclination
The moment the forks take the weight of the automobile, your rear wheels lose a percentage of their ground pressure. To pull the center of gravity back toward the rear counterweight, you must immediately apply rearward mast tilt. Tilting the mast back five to eight degrees cradles the car against the carriage frame, preventing it from sliding off the tines under heavy braking or during sudden downhill descents.
Mast Operation Safety Sequence
• Initial Lift: Raise the carriage four to six inches off the pavement to clear the ground entirely.
• Rear Tilt Application: Tilt the mast backward until the rescued car firmly contacts the mast uprights.
• Ground Clearance Setting: Lower the load slightly so it rides as close to the street surface as possible during transit.
• Suspension Settle Check: Pause for two seconds to confirm the rear counterweight does not float or bounce before shifting into gear.
Never transport a load with the mast extended into the air. Driving with an elevated load raises the forklift's combined center of gravity, making a sideways rollover virtually guaranteed the moment you make even a gentle turn. Always keep your loads carried low to the asphalt to ensure maximum stability and forward visibility.
Phase 7: High-Speed Urban Navigation Under Rescue Timers
With the damaged vehicle secured and the clock ticking, you must transport the cargo back to the impound lot, garage, or emergency triage depot. This transit phase represents the highest risk of mission failure. You are piloting a vehicle that weighs several tons, carrying an off-center payload, moving through active city traffic at maximum speed. Balancing speed boosts and kinetic restraint requires disciplined throttle management.
Balancing Speed-Boost Reserves with Kinetic Stability
Many levels grant a temporary sprint or boost. Using this boost unwisely while loaded is an easy way to flip your forklift. The boost function should only be used on long, perfectly straight asphalt boulevards where there is zero need to turn the steering wheel. If you tap the steer controls while under boost acceleration with a vehicle on your forks, the resulting centrifugal force will overcome your tires and send you spinning out.
Tactical Driving Guidelines on Asphalt
• Straight-Line Boosting: Fire the speed boost solely when traveling on flat, obstacle-free straightaways.
• Early Braking Thresholds: Double your braking distance compared to unladen driving; heavy momentum causes long stopping slides.
• Pothole and Curb Evasion: Avoid driving over road curbs, roadwork bumps, or debris piles that can bounce the load loose.
• Camera Perspective Optimization: Switch to a high chase-cam view to see past the vehicle on your forks and monitor forward traffic.
Monitor your speed closely when entering roundabouts or tight intersections. Sacrificing two seconds to brake into a turn saves you the thirty seconds it takes to recover from an overturned load or a collision with traffic barriers. Smooth, steady momentum consistently delivers faster mission times than reckless sprinting and skidding.
Phase 8: Transporting Asymmetrical and Hazardous Loads
As you progress into the mid- and late-game stages of City Rescue Forklift Simulator, missions become considerably more demanding than simple passenger car extractions. You will be tasked with clearing overturned delivery vans, industrial machinery containers, fragmented construction materials, and asymmetrical wreckage from multi-vehicle collisions. These objects have irregular weight distributions that throw off traditional center-of-gravity calculations.
Mitigating Load Shifting and Center-of-Gravity Shifts
When dealing with an asymmetrical target, such as a box truck with a crushed engine bay or a concrete-laden trailer, the visual center of the object rarely matches its true center of gravity. If you lift the object and notice one fork dipping lower than the other, set it down immediately. Disengage, back out, reposition your forks toward the heavier side, and re-engage. Carrying an uneven load across city streets induces heavy chassis twist that pulls your steering wheels off the ground during turns.
Protocols for Compromised Cargo
• Heavy-Side Bias: Place your fork tines closer to the heavy end (such as the engine bay or payload axle).
• Maximum Backward Tilt: Utilize the maximum allowable mast angle to pull unstable cargo back against the frame.
• Reduced Transit Velocity: Cap your top speed at 60% of maximum when hauling irregularly shaped wreckage.
• Zero-Sharp Steering: Make wide, progressive steering inputs rather than snapping the rear end around corners.
If the cargo begins to shift or slide forward during transit, come to a smooth, gradual stop. Tap your hydraulic tilt to bring it back toward the mast before continuing. Trying to save a falling load by accelerating forward or slamming the brakes will always result in dropped cargo and lost mission stars.
Phase 9: Precision Drop-Off and Safe Placement at Depots
Delivering your recovered vehicle to the municipal impound lot, salvage yard, or maintenance bay is the final operational phase. Many operators ruin a flawless mission by rushing their entrance into the delivery zone and dropping the car outside the yellow designation box. The mission tracking system demands accurate placement; failing to park the cargo cleanly within the target perimeter delays mission completion and costs you time bonuses.
Entering Loading Bays and Uncoupling the Cargo
As you approach the depot unloading zone, bring your machine to a crawl. Depots are often cramped, surrounded by metal fencing, tire stacks, and other stored machinery. Align your forklift straight with the drop-off bay well before entering its borders. Once the rescued vehicle hangs directly above the designated marker lines, bring the forklift to a dead stop and apply the handbrake.
Disengagement and Parking Criteria
• Neutral Mast Alignment: Tilt your mast back to the vertical (zero-degree) position so the load sits parallel to the ground.
• Gentle Hydraulic Descent: Lower the forks smoothly until the rescued car rests fully on the ground and weight is off the tines.
• Clear Fork Backing: Shift into reverse and slowly back straight out, ensuring the tines do not catch on the vehicle's undercarriage.
• Park Zone Clear: Back completely clear of the yellow boundary box until the mission completion banner triggers on your screen.
Never pull away while your forks are still bearing weight, as dragging the vehicle across the tarmac causes collision damage deductions. Take your time to extract the steel tines cleanly. Once you clear the delivery bay, the mission score screen will tabulate your time, damage penalties, and accuracy ratings to pay out your mission rewards.
Phase 10: Fleet Management, Upgrades, and Extreme Operations
Earning cash and commendations from completed rescue missions opens the door to the simulator’s garage progression system. Spending your hard-earned funds indiscriminately on cosmetic paint jobs will quickly stall your career progression. To handle late-game assignments—including multi-ton tour bus recoveries, night rescues during severe rainstorms, and intense multi-car pileups—you must systematically upgrade your machinery's mechanical components.
Reinvesting Rescue Earnings into Heavy-Duty Fleets
Every upgrade you purchase directly alters the operational capabilities of your machine. In the early career, your standard counterbalanced forklift suffers from weak hydraulic pump speed, sluggish acceleration, and limited load ratings. By investing in heavy-duty commercial upgrades, you shorten the time required to lift massive loads and improve your hill-climbing power on elevated bridges.
Priority Upgrade Hierarchy
• Hydraulic Flow Rate: Increases fork raising and lowering speeds, slashing precious seconds off every pickup and drop-off.
• Engine Torque: Ensures your forklift maintains top transit speeds even when carrying the heaviest SUVs and delivery vans.
• Tire Compound Grip: Reduces braking distances and prevents dangerous sideways skidding on wet roads and tight turns.
• Counterweight Tonnage: Expands your stability margin, allowing you to lift oversized commercial cargo without rear-axle lift.
When you have maximized your starter rig, invest in specialized heavy-lifter variants, such as telehandlers or heavy four-wheel-drive industrial lifters. These advanced units feature broader tire tracks, extendable reach booms, and enhanced headlights for severe weather operations. Equipped with a fully upgraded fleet, no urban disaster or roadway blockage in the city will be beyond your ability to resolve.
Success in City Rescue Forklift Simulator comes down to precision and discipline. It is not a reckless arcade racer, but an authentic heavy-machinery simulator where urban physics, load weight, and careful planning dictate every victory. By respecting the rear-steer dynamics of your machine, establishing steady on-scene routines, and securing each load with appropriate mast tilt, you can handle any emergency the city throws at you.
Every callout is a test of planning, spatial awareness, and spatial execution. Keep your center of gravity low, monitor your swing arcs, choose your routes with care, and steadily upgrade your fleet. With these strategies at your fingertips, you are ready to hit the streets, clear the roads, and establish yourself as the city’s premier emergency forklift operator.
Summary:
Master City Rescue Forklift Simulator with this ultimate guide covering controls, rear-wheel steering, vehicle recovery, load physics, and advanced urban tactics.