How to Dominate in Call of Duty: Warzone
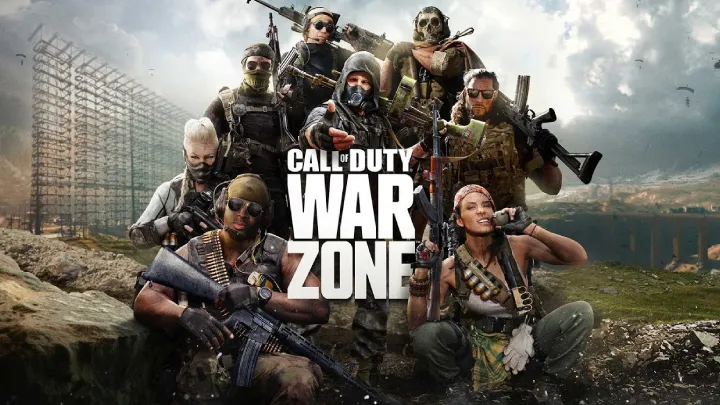
Call of Duty: Warzone is a high‑stakes battle royale that demands more than raw aim. Consistent success requires deliberate preparation, map knowledge, economy management, coordinated team play, intelligent rotations, and clutch endgame decision‑making. This how‑to breaks a match into ten chronological stages so you can apply a repeatable process from the drop to the final circle. Each section contains focused paragraphs and practical lists you can implement immediately—no vague platitudes, just actionable advice to convert practice into wins.
Pre‑match preparation: settings, hardware, and mindset
Your match begins long before the plane crosses the map. Fine‑tuned settings and reliable hardware remove avoidable disadvantages and let you focus on in‑game choices. Spend time tuning sensitivity in small increments; a tiny change can significantly improve tracking and recoil control. On PC, set a stable, high framerate; on consoles prioritize input lag reduction and consistent performance. Turn off motion blur and other visual effects that interfere with clarity. Rebind keys or buttons for quick swaps and building (if you use creative binds) so your hands move instinctively.
Network and audio choices matter. If possible, play wired for lower latency; configure your router for gaming or enable QoS if bandwidth is shared. Use a headset with clear directional audio so you can reliably hear footsteps, vehicles, and reloads. Mentally, adopt a short pre‑match routine: 5–10 minutes of aim warmup, check the day’s patch notes or meta shifts, and set 1–2 micro goals for the session (for example, “practice third‑party discipline” or “work on early recon completion”). A calm, routine warmup reduces tilt and improves micro‑decision making.
Essential settings checklist:
- Adjust sensitivity and deadzones incrementally until aiming feels consistent.
- Increase FOV (PC) to balance peripheral awareness with target clarity.
- Disable motion blur; enable clearer HUD and contrast settings.
- Rebind weapon swap and tactical throws for quick access.
Equipment and mental prep:
- Wired ethernet preferred; stable ping is worth more than higher settings.
- Low‑latency headset for positional audio.
- Warmup routine: 5–10 minutes aim practice + 1 strategic micro goal.
Choosing where to drop: risk, reward, and team strategy
The drop decision sets your initial tempo. High‑traffic points quickly yield loot and kills but come with high death probability. Choose them only if your squad excels at early coordination and aggressive entry plays. If your aim is to survive to mid/late game—or learn rotations—pick quieter residential areas, small towns, or compounds along the bus route that offer decent loot with lower early conflict.
Coordinate with teammates before the drop. Use pings or concise voice calls to determine exact building or roof targets; landing in different buildings can spread your squad thin and make early revives harder. When landing, aim for roofs or top floors to gain immediate sightlines and control. Prioritize grabbing a weapon, armor plates, and tactical items in the first 30 seconds. If you encounter an enemy immediately, use verticality and windows to deny direct lines of sight and escape through stairwells.
Drop decision factors:
- Team playstyle: aggressive vs passive
- Bus path and glide distance
- POI loot density and accessibility
Landing best practices:
- Target roof/upper floor for initial sight and control
- Prioritize plate, primary weapon, and tactical equipment
- Coordinate landing points precisely to ensure revive coverage
Early looting and initial fights: prioritize survivability
First‑minute loot choices determine whether you can survive initial encounters. Your top priorities are armor plates, a usable primary weapon, a secondary if available, and a tactical (stun/flash) for breaching or close fights. Avoid lingering over cosmetic items or low‑value pickups during early scrambles; every second you spend looting is a second an enemy can close distance.
If you encounter an opponent early, control engagement range: use shotguns or SMGs for close fights and ARs for more open areas. Use stuns or flashes to disrupt enemies behind cover before pushing. If outnumbered or poorly equipped, disengage—fall back through windows, stairwells, or roofs to buy time and regroup. Surviving to reorganize and rebuy is often the smarter play than forcing a risky kill.
Early loot priority list:
- Armor plates and Plate Carrier (if present)
- Primary weapon + ammo
- Tactical (stun/flash) and lethal (frag/semtex)
- Self‑revive or gas mask (situational)
Quick combat tips:
- Pre‑aim common doorways and choke points
- Use audio cues to identify exact enemy positions before peeking
- Replate and heal immediately after fights before pushing onward
Contracts and economy: earning and spending cash efficiently
Warzone’s economy fuels your late‑game options. Contracts are structured ways to gain predictable cash and strategic advantages—choose them intentionally. Recon contracts reveal the safe zone early, which strongly influences rotation choices. Bounties create predictable fights and steady cash for purchases. Scavenger contracts can be beneficial when you prefer looting concentrated zones, and Most Wanted is situationally useful if your team wants to pressure others while gaining Gulag immunity.
Spend your cash where it increases squad survivability and capability. Loadout Drops are often the highest return on investment—owning your preferred class improves consistency. Self‑Revive kits, UAVs, and additional plates are high‑value mid/late game buys. If your squad is cash‑poor and facing a safe‑route to mid game, consider splitting funds for basic plates and one shared UAV rather than one extravagant purchase that leaves others under‑geared.
Contract and spending priorities:
- Early: Recon or Scavenger for map info and loot
- Mid: Bounty for cash and control; start saving for Loadout Drop
- Late: Self‑Revive, UAV, Armor Satchel, and Loadout Drops if safe
Buy station priority order:
- Loadout Drop (if safe)
- Self‑Revive kits and UAVs
- Armor and ammo purchases
- High‑impact killstreaks (cluster, precision) late game
Loadout optimization: weapons, attachments, and perks
Loadouts turn random drops into consistent performance. Choose weapons you can control and adapt attachments for recoil management, ADS stability, and range. Prioritize muzzles and barrels that reduce vertical recoil, underbarrels for ADS steadiness, and optic choices that match your typical engagement range. Larger magazines are useful if you anticipate sustained fights, but only if you can handle the tradeoff in recoil.
Perk selection should reflect your role. Common setups include Double Time / Ghost / Amped for mobile fragging, and EOD / Overkill / Ghost for heavy front‑line play. Ghost is especially valuable for late game to avoid UAV detection. Coordinate perks with teammates—there’s no value in all players picking the same utility if a broader coverage (e.g., one Ghost, one EOD, one Tracker) is more advantageous.
Role-based loadout examples:
- Entry Fragger: high TTK AR, Double Time, Ghost, Amped; stun + frag
- Anchor/Support: LMG or hard‑hitting AR, EOD, Ghost, heartbeat sensor
- Sniper/Recon: sniper rifle or marksman, Ghost, Dead Silence, UAV/thermals
Attachment priority list:
- Muzzle/Barrel: control vertical and horizontal recoil
- Underbarrel: improves ADS stability and recoil recovery
- Magazine: if fights involve multiple targets; increases sustained fire
- Optic: reflex for close fights, variable or 4x for long ranges
Movement and rotations: safe routes, high ground, and escape plans
How you move across the map is often more important than single engagement skill. Plan rotations based on Recon/UAV intel and circle placement: rotate early when needed but avoid moving into predictable choke points such as long roads or open fields. Prefer routes that offer intermittent cover—buildings, ridgelines, and vegetation—so you can mask movement and break line of sight.
High ground provides vision and a defensive advantage, but it can be punished by explosives or flanking. Secure rooftops or hills only if you have an escape plan and knowledge of likely enemy approaches. Always maintain at least two route options when rotating; single predictable paths get you boxed in. Use vehicles judiciously—great for long travel but loud and a magnet for attention.
Rotation checklist:
- Check recon/UAV intel and remaining squad count
- Plot a path using cover and alternate escape routes
- Rotate during gas shifts or while enemy attention is elsewhere
Movement do’s and don’ts:
- Do split slightly to reduce team wipe risk while staying in ping/voice range
- Do use buildings and terrain to mask movement; avoid open fields
- Don’t rush rotations without smoke or a vehicle when exposed
Team communication and revive protocols: coordinated decisions
A coordinated squad beats individual skill. Establish concise callouts and a lightweight role structure at the start: who peeks first, who holds the close angle, and who manages buy station decisions. Use pings liberally for exact positions; they are less ambiguous than long voice callouts in heated fights.
Reviving has to be a calculated decision. Never attempt a revive without securing a perimeter; use smokes and stuns to create space or have one teammate hold angles while another revives. If the risk of a wipe is high, prioritize survival—sometimes abandoning a revive and regrouping is the correct play. Have clear buy station roles: who will spend on loadouts, who will hold cash for plates or self‑revives, and when to consolidate funds for late buys.
Communication and revive essentials:
- Use pings for precise positioning; keep voice calls concise
- Assign roles: fragger, anchor, buyer
- Revive flow: secure perimeter → smoke/stun → revive → fallback if contested
Gunfights and utility usage: framework for winning engagements
Gunfights are where outcomes decide matches, but utility and preparation often determine who wins. Before entering a room or compound, stun or flash to disrupt defenders, and use smoke to obscure revives or repositioning. Practice two‑man breaching: one player uses utility to force movement while another holds crossfires.
Aim training should be deliberate: work on short controlled bursts at mid range, snap aiming for close range, and tracking while strafing. Learn to read enemy behavior—people reloading, peeking predictable angles, or clustering around loot. Use this reading to bait and punish. Avoid tunnel vision on a single kill; always consider the risk of a third party approaching.
Fight engagement template:
- Gather intel (heartbeat, UAV, sound)
- Use utility to disrupt (stun/flash/smoke)
- Execute with crossfire and disciplined trades
Common combat mistakes:
- Fighting with low plates or ammo
- Ignoring potential third parties during prolonged firefights
- Pushing without utility or a clear fallback
Endgame tactics: final circles, forcing plays, and patience
The final circles magnify mistakes. Prioritize information and positional advantage; if you’re inside the safe zone, play the clock—force enemies to move and deny routes with explosives. If you’re on the edge, focus on mobility and small cover pockets that let you rotate with minimal exposure. High ground is valuable for vision, but only if you can prevent flanking.
Forcing plays requires leverage—cluster strikes, precision strikes, and coordinated multi‑angle pushes can flush defenders. Time these with the gas to limit escape routes. Be patient: if opponents must move, let them show themselves first and then cut them off. When committing to an attack, use smokes and stuns to obscure sightlines and assign roles for who peeks, who secures, and who watches flanks.
Final circle checklist:
- Full plates on all teammates
- Self‑Revives when possible
- At least one source of intel (UAV/Heartbeat)
- Ammo and utilities for final pushes
Endgame playstyles:
- Passive: fortify and force others to push (best when low mobility)
- Aggressive: coordinated multi‑angle assault with utility and recon
Post‑match review and long‑term improvement
Winning consistently requires systematic improvement. Record your matches and review deaths—identify patterns like bad rotations, poor positioning, or utility misuse. Focus on 2–3 habits per week (for example: “use stuns before breaching” or “rotate earlier”) rather than trying to fix everything at once. Create a short weekly plan: aim warmups, specific drills (1v2 clutch scenarios), and review sessions.
Stay current with patch notes and pro play to adapt your loadouts and strategies. The meta shifts frequently; weapons and attachments that were dominant last week might be nerfed next patch. Engage with community resources—high‑level streams, pro guides, and Discord groups—to learn new rotations and creative tactics. Celebrate small improvements and view losses as learning opportunities: the best players turn mistakes into repeatable corrections.
Improvement routine:
- Daily: 10–15 minutes aim warmup
- Weekly: review 2–3 critical fights, track micro goals
- Monthly: adjust loadouts per patch notes and meta observations
Consistent success in Call of Duty: Warzone is the sum of many small disciplines: pre‑match preparation, purposeful drops, prioritized looting, smart contract and buy decisions, loadout optimization, intelligent rotations, coordinated team play, and calm execution in gunfights and endgame scenarios. Use the ten‑stage process above as a playbook—practice the checklists, rehearse templates, and review your matches to correct recurring mistakes. Over time, disciplined habits and informed decision‑making will convert practice into more wins, frequent clutch moments, and a deeper mastery of Warzone’s competitive battlefield.
Summary
Dominate Warzone by mastering prep, drops, looting, contracts, loadouts, rotations, team comms, combat utility, endgame tactics, and consistent review for improvement.